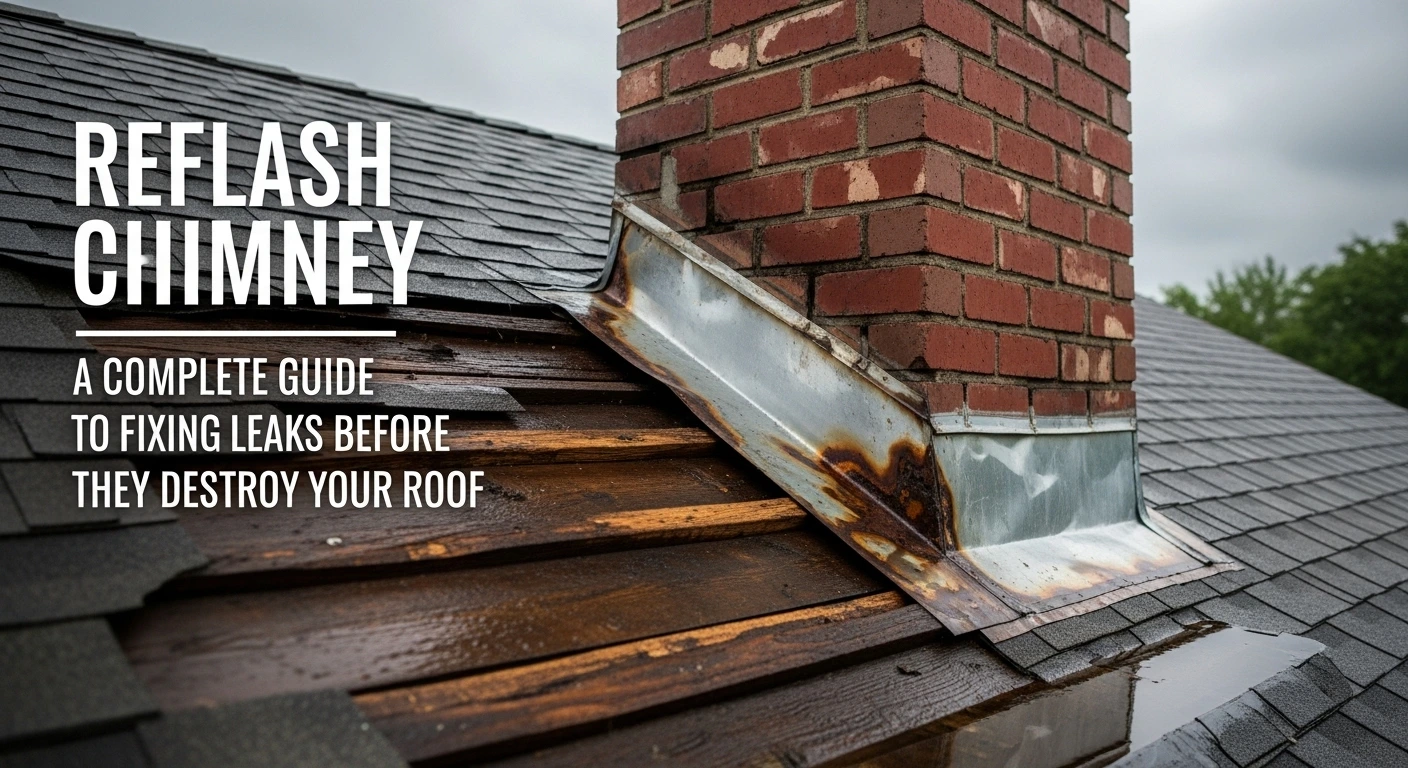
Water drips down your living room wall every time it rains. You check the roof. Shingles look fine. Gutters are clear. Then where is the problem? It is flashing around the chimney.
The thin barrier of sheet metal between the chimney and roof leaks or corrodes. And when it happens, water gets into your attic. Rots roof decking and ruins insulation.
The failure may not be sudden and the signs are obvious. You just need to look for that and get it fixed right.
What is Chimney Flashing? (And Why It Fails)
Chimney flashing is a sheet metal to prevent water leaks from upside to down. It is a waterproof seal between two surfaces roof and chimney that don’t naturally fit together. Rigid brick and flexible roofing material.
Why Chimney Flashing is So Important?
Water spills over the roof. Can be rain or whatsoever. Water seeps from the chimney, can be soaked into the roof deck. It can rot wood framing and drip into the ceiling. Flashing keeps the water to the roof surface and from there into gutters. Away from your house.
Flashing is a watertight seal between two surfaces. The chimney’s masonry and roof’s shingles.
It handles:
- Rain hitting the sides of the chimney
- Snow melt pooling at the base
- Ice dams forcing water under roofing material
- Expansion and contraction from temperature swings
It fails because:
Metal corrodes. Roofing cement cracks. Mortar joints crumble. Counter flashing separates from brick. One gap lets water go under the roof deck, and you may not see the damage for months. When you see, by then, the rot has spread.
How to Know Your Chimney Flashing Needs Replacement
The chimney flashing needs replacement when the following signs appear:
1. Rust Stains Metal Flashings
Orange streaks mean the protective coating wore off. Water already penetrated. The metal’s compromised.
2. Gaps Between Flashing and Brick
Counter flashing sits in a mortar joint cut into your chimney. That joint cracks over time. You’ll see separation sometimes big enough to fit your fingers.
Water pours straight through.
3. Cracked or Missing Roofing Cement
Old cement turns brittle. It splits. Falls out. Leaves the base flashings exposed.
Run your hand along the joint. If chunks come off, you need resealing at minimum.
4. Water Stains on Interior Walls or Ceilings
Brown rings near the chimney mean water leaked for weeks. Maybe months.
Check your attic first wet insulation, dark wood, or a mold smell are early red flags, often pointing to chimney cleaning warning signs that homeowners miss until leaks appear indoors.
5. Lifted Shingles Around the Chimney
Step flashing weaves between shingle courses on the sides of the chimney. If shingles curl or lift, the flashing beneath probably shifted or corroded.
Every lifted edge is a water entrance.
Proper Chimney Flashing: The 4-Part System That Actually Stops Leaks
Good chimney flashing isn’t one piece of metal. It is a layered defense.
Base flashing (apron):
Covers the down-slope side. Is under shingles, extends onto chimney base. It is the first line of defense against rain.
Step flashing:
L-shaped pieces woven into each shingle course on the chimney’s sides. Channels water down the roof slope without letting it behind the chimney.
Counter flashing:
Covers the top edge of base and step flashing. Embeds into mortar joints. Prevents water from running behind lower flashings.
Back pan (cricket):
A small metal structure behind tall chimneys. Diverts water around the chimney instead of letting it pool. Required on chimneys wider than 30 inches.
Even one missing component can wreck it because water needs only a small gap to percolate.
How to Replace Chimney Flashing: The Step-by-Step Process Pros Use
You can replace the chimney flashing yourself. All you need is a few tools and doing the steps in sequence.
Materials You Need
- Sheet metal (aluminum, copper, or galvanized steel)
- Ice and water shield underlayment
- Roofing cement (polyurethane or rubberized)
- Metal snips
- Grinder with masonry blade
- Roofing nails
- Caulk gun
- Safety harness
The Installation Sequence
1. Remove old flashing and damaged shingles
Pull nails. Pry up roofing material around the entire chimney base. Inspect the roof deck for rot. Replace any soft or dark wood before you continue.
2. Install ice and water shield
Apply a self-adhering membrane 6 inches up the chimney and 12 inches onto the roof deck. This catches water if the metal fails.
3. Install base flashing (apron)
Cut sheet metal to fit the front of the chimney. Bend it to create a 90-degree angle. Nail the horizontal section to the roof deck. Seal the vertical section against chimney bricks with roofing cement.
4. Weave in step flashing
Starting at the base, place one L-shaped piece of step flashing against the chimney. Nail it to the roof deck (not the chimney). Lay a shingle over it. Repeat up both sides of the chimney.
Each component should overlap the one below by 3 inches minimum.
5. Cut and install counter flashing
Use a grinder to cut a 1.5-inch groove into the mortar joint, about 1 inch deep. Insert the top edge of the counter flashing into this groove. Bend the bottom edge to cover your step and base flashings. Seal the groove with mortar or polyurethane caulk.
6. Build a cricket (if needed)
For chimneys wider than 30 inches or on steep roof slopes, frame a small peaked structure behind the chimney. Cover it with sheet metal. This diverts water around the chimney instead of letting it pool.
7. Seal all joints
Apply roofing cement at every flashing overlap. Seal where metal meets brick. Check for gaps. One unsealed joint can ruin the entire job.
Why DIY Flashing Fails (And Costs More Long Term)
You might have followed every step holistically and used the right tools but still DIY flashing can fail. It can because of:
Common mistakes to avoid while DIY flashing:
- Using aluminum flashing with galvanized nails (causes corrosion)
- Nailing through the chimney face (cracks mortar)
- Skipping the ice and water barrier
- Not embedding counter flashing deep enough
- Over-relying on roofing cement instead of mechanical fasteners
A poorly installed flashing lets water in immediately. You won’t notice until the ceiling stains appear. Professional roofing around chimney work costs $400–$1,200 depending on chimney size and roof pitch. This includes proper flashing and roof integration plus warranty.
DIY materials can cost you $150–$300 but have no warranty if the DIY will go right.
How to Inspect and Maintain Fireplace Flashing: Stop Leaks Before They Start
You should inspect fireplace flashing in following scenarios:
Twice a year (spring and fall):
- Check for rust, cracks, or separation from the chimney
- Inspect mortar joints where counter flashing embeds
- Look for lifted shingles near step flashing
- Seal any small gaps with polyurethane caulk
- Clear debris from behind the chimney (leaves trap moisture)
After major storms:
Walk your roof. Look for displaced flashing or new gaps. High winds pry metal loose.
During annual chimney inspection:
A professional sweep checks flashing from inside and outside. , and knowing the chimney care benefits helps prevent moisture damage before it spreads. They spot problems you can’t see. The inspection reveals chimney maintenance benefits that extend beyond just the flashing, including early detection of water damage, structural issues, and fire hazards that develop when the entire chimney system isn’t properly maintained.
Repairing Chimney Flashing vs Full Replacement: When to Choose Each
Minor Repairs (Under $200)
Fix if:
- Small gaps in roofing cement
- Loose counter flashing in one mortar joint
- Minor rust spots on otherwise solid metal
Process: Clean the area. Apply polyurethane caulk or roofing cement. Reseal the mortar joint.
This buys you 2–3 years max.
Full Replacement ($400–$1,200)
Replace when:
- Rust perforates the metal
- Multiple sections show damage
- Water stains appear inside
- Flashing is over 20 years old
- You’re replacing the roof anyway
Old flashing under new shingles fails fast. The roofing material around it is fresh. The metal isn’t. Leaks start within a year.
Always reflash chimney during roof replacement. It’s 20% of the labor cost but prevents 80% of future leak calls.
The Cost of Ignoring Damaged Chimney Flashing
Water damage progression:
- Month 1: Flashing gap forms, water enters
- Month 3: Roof deck softens, insulation soaks
- Month 6: Mold grows in attic, drywall stains
- Month 12: Framing rots, ceiling sags, electrical hazards develop
Actual costs:
- Reflash chimney: $400–$1,200
- Replace rotted roof decking: $800–$2,000
- Fix water-damaged ceilings and walls: $1,500–$4,000
- Mold remediation: $2,000–$6,000
- Structural framing repair: $3,000–$10,000
A $600 flashing job ignored becomes a $15,000 insurance claim. And some policies exclude water damage from “deferred chimney maintenance benefits.”
Your Action Plan: Fix Flashing Around Chimney Before Next Rain
If you see active leaks:
- Call a licensed roofer immediately
- Place tarps to prevent further interior damage
- Document everything with photos (for insurance)
- Get written estimates from 2–3 contractors
If flashing looks questionable:
- Schedule a roof inspection within 30 days
- Ask specifically about flashing condition and roof deck integrity
- Request photos of problem areas
- Budget for replacement if metal shows rust or separation
If you’re planning a roof replacement:
- Insist on complete flashing replacement in the contract
- Specify material type (copper lasts 70+ years, aluminum 20–30)
- Require ice and water shield around the entire chimney base
- Verify the contractor will install a cricket if your chimney exceeds 30 inches wide
For new construction or additions:
Work with roofers who understand proper chimney flashing installation. Check their process includes all four flashing components and correct overlap sequencing.
FAQs
Can I reseal chimney flashing without replacing it?
Yes but temporarily. If the metal is intact and gaps are small. Clean surfaces, apply polyurethane caulk. But if rust perforates the metal or counter flashing pulls away, resealing won’t stop leaks.
What’s the best material for roof chimney flashing?
Copper costs more upfront ($1,200–$2,000 installed) but outlasts everything. Aluminum can cost around $400–$800) and works well for most homes. Avoid galvanized steel in coastal areas. Salt air corrodes it very fast.
How do I know if my roof deck is damaged from bad flashing?
Check your attic. Dark wood, soft spots, water stains, or sagging decking means water penetrated. You’ll need deck replacement before new flashing goes on.
Should I replace flashing when I replace my roof?
Always. New shingles last 20–30 years. Old flashing fails in 5–10. Mismatched lifespans guarantee callback leaks. Reflash during roof replacement or pay double later.
Storms test flashing. Every freeze season widens the cracks.
Fix it now while it’s a $600 flashing job. Wait, and you’re replacing roof decking, framing, and drywall for $10,000+.
Schedule a roof inspection this week.
Your attic will thank you.